
Coordinators and role owners are allowed to request the addition or removal of members from roles they manage. The same basic process is used whether this is adding or removing members from a group, from a resource (cluster), or from a defined role.
- Adding or removing people from a group involves editing an explicit "group" role.
- Adding or removing accounts on a cluster involves editing an explicit "resource" role.
- Adding or removing members from a high level role involves editing a "defined" role.
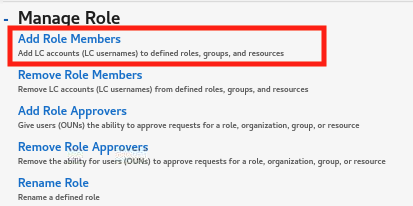
To add a person to a role, select the "Add Role Members" action from the Requests page. To remove a person, select the "Remove Role Members" action.
Adding members to a role
Step 1: Login
Log into the new IDM and authenticate via LC OAuth.
Step 2: Select "Request" from the menu
Step 3: Select "Add Role Members" from the list of actions
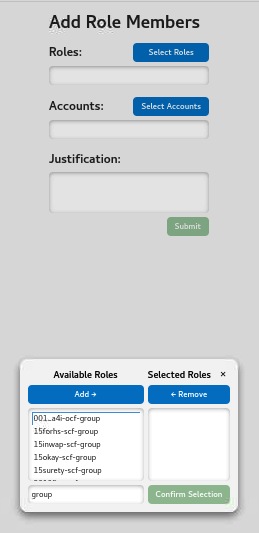
Step 4: Choose users to add to role
- Click the "Select Role" button to see a list of available roles. Use the Filter to quickly find the role of interest. E.g., type "group" to see all of the group roles, or type a few characters from the resource, group name, or defined role to find it. Click "Confirm Selection" to make your choice.
- Click the "Select Accounts" button to see a list of users. Click "Confirm Selection" to make your choice.
- Provide a justification for the change
- Press "Submit" to submit the request. The owner or designee of the role will then be asked to approve the request.
- After the approval step is complete, it will take up to 20 minutes for your changes to appear on OCF machines and up to 2 hours for SCF machines.
Removing members from a role
Follow the same steps described above for adding members, but instead choose the "Remove Role Members" operation in Step 3.