
Creating a new LC group is a multi-step process that any IDM user can perform.
Step 1: Login
Log into the new IDM and authenticate via LC OAuth.
Step 2: Start New Request
- Click the "Start New Request" button

- Users will see a "Create Account or Group" section in IDM. Select "Create Group".

Step 3: Reserve the name of the group
Click on the "here" link above the Group Name field to reserve the name for the group.
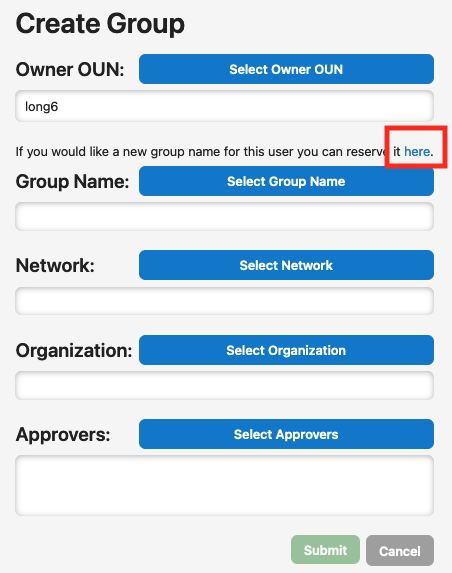
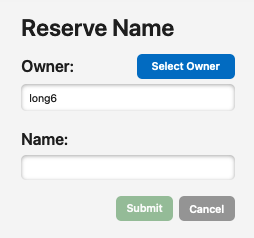
Enter the name of the desired group and the OUN of the person who will be the designated owner for the group.
Step 4: Create the group
Provide details for the new group.
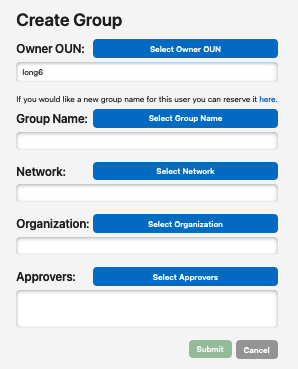
- Choose the group name that matches the reserved group name from Step 3 above.
- Select the network(s) to which this group should be made available.
- Choose the organization associated with this group.
- Select one or more people who will be responsible for approving changes to this group, including membership.
Step 5: Add or remove group members
See: IDM—Add or Remove Group Members
NOTE Approvers are not automatically made members of a group. Be sure to add all appropriate users (such as yourself) to newly created groups.