Globus is a file transfer software ecosystem widely used in the science and research community. It offers the ability to transfer large amounts of data in parallel and over secure channels between various "endpoints."
Globus in LC
Livermore Computing (LC) has received authorization to set up a Globus endpoint in the Green Zone, available to all users with an LC user account (see User Access). LC's Globus endpoint runs version 5.x of the Globus software, is named "LC Public", and is findable in the Globus Web App.
Data Restrictions
The Globus service does not protect sensitive data. As such LLNL owned information should go through LLNL's Information Management (IM) process before being being staged or transferred on the Globus endpoint. Data not owned by LLNL, and known to not need protection in its current form, can be transferred via this tool. LLNL must have no legal responsibility to protect such data. In summary:
- LLNL-generated data – must go through R&R for “public” release
- Outside-generated data:
- LLNL must have no legal responsibility to protect
- Follow agreements with data owner for protection
More information on this process can be found at Review and Release of Large Datasets.
Endpoint Configuration
LC's Globus endpoint is configured on a cluster called goblin and features the following specifications:
- 4x Data Transfer Nodes (DTNs), each with
- 2x Intel Xeon Gold 6226R 2.90GHz CPUs, with 32 cores and 64 threads per node
- 192 GB DDR4-2933 memory
- 2.1 PB staging storage (for sending/receiving data through Globus)
The endpoint is set up as a High Assurance endpoint, meaning data transfers must be encrypted. This also means that data transfers to or from and endpoint that does not support encryption will not work.
Staging/Copying Data
The LC Globus endpoint offers a 2.1PB file system, mounted via NFS, for staging data. This file system is mounted as /p/globfs with a directory for each user. This user directory is the default data sharing location in LC's Globus endpoint. NOTE The data sharing directory is NOT your home directory.
Because the Globus endpoint does not connect to LC's CZ file systems, data must be copied to and from the CZ and this file system. You may use SSH and SCP/SFTP or other file transfer tools to transfer data between the CZ and goblin. It is recommended to use the oslic cluster for file transfers for maximum bandwidth. Please note that your home directory on goblin is /home/<username> and is intentionally not set up for sharing data. Home directories also have a very limited capacity so data meant for staging should be copied directly to /p/globfs/<username>.
For users who need to do large scale data transfers, the globftp tool is available for use on oslic. This tool will automatically connect to goblin via an FTP connection, and all subsequent transfers will be performed in parallel.
SSH/SFTP to the Globus Cluster
As mentioned above, there are four data transfer nodes in goblin, the cluster that hosts the Globus endpoint. Users may find it helpful to log in to one of the nodes to manually organize or otherwise manipulate their data. The nodes are accessible from the CZ via SSH and SFTP. To log in to the cluster, users should SSH to "goblin.llnl.gov" or "goblin" for short, putting them in their home directory on one of the four DTNs. Remember, the data share directory is at /p/globfs/<username>, not your home directory, and that home directories have limited space. NOTE Compute jobs are not allowed on the DTNs.
For users who need to do large scale data transfers, the globftp tool is available for use on oslic. This tool will automatically connect to goblin via an FTP connection, and all subsequent transfers will be performed in parallel.
Using LC Globus
User Access
All LC users can use the LC Globus service in accordance with the aforementioned data restrictions. To access the service, they must first request access to Goblin, the cluster hosting the LC Globus endpoint. To request an account for Goblin and therefore Globus, please go to LC IDM, click Request at the top of the page, then Add Account Roles at the bottom of the new page. That should give you a page where you select your OUN and LC account name. In the Roles box, select the Select Roles button and type "goblin" in the filter box at the bottom. That should show the "goblin-ocf-resource" resource, which you'll then click on to highlight, click the Add button, and then Confirm Selection. You can then enter a justification for why you need a Goblin account, such as "To use Globus", and finally click Submit. Once your account has been approved, the LC Hotline may need to notify the Globus system administrators to manually add the account to Globus. NOTE Access to the web-interface described below requires Active Directory (AD) credentials.
Navigating the Globus Interface
Globus offers both a Web interface as well as a fully-compatible command-line interface (CLI). This page assumes usage of the Web UI but documentation on the CLI can be found here
To get to the Globus Web App, point your browser to https://app.globus.org

Once you hit Continue, you may be automatically logged in to Globus if you have cached credentials on your workstation. Otherwise, follow the prompts and it should redirect you to a LivIT identity management page similar to the one below to authenticate with your LLNL AD credentials:

You will then be placed into the Globus file manager as shown below. With the file manager, you can search for Collections -- which are user or administrator-defined collections of files on endpoints around the world.

From the file manager interface, you can start typing in a Collection name that you wish to browse, whether as a source or a destination. As you type, Globus will show names of existing Collections that match what you have typed. You can then select the one you want, such as "LC Public":

Once you select a Collection, unless it allows anonymous access, you will need to be authenticated in order to see the contents of the Collection. If you have credentials cached on your workstation, you should be transparently logged in to the LC Public Collection. If not, you may be passed to the LLNL IdP to authenticate.
Once authenticated to the LC Public Collection, you will be placed in your default data sharing directory of /p/globfs/<username>. You may also browse to other folders you have permissions to access.

From this view you can browse or manipulate files you have access to. You may also click on the "Transfer or Sync to" link on the right to open a second Collection browser and select another Collection with which to transfer files. You may also choose to "share" a subset of your files to other Globus users, whether at LLNL or not.
Transferring Files
As in the picture below, you can then drag and drop folders and files from one browser to the other to initiate a transfer. Likewise, you can select the files you wish to transfer and click the "Start" button at the top of the browser window.

Once a file transfer has started you can monitor it (and see past transfers) via the Activity screen accessed via the icon on the far left. On that screen you can view active and past transfers, debug information, and errors you might have encountered. Note that you should also receive an email on completion of a transfer, notifying you of its success or failure.

Sharing Files (Guest Collections)
Only users with active LC accounts will be able to authenticate to the LC Public endpoint, so in order to share data with collaborators outside of LLNL, you will want to create what is called a Guest Collection. You can set up multiple collections shared with different users. Those users will be able to browse to your guest collection in the Globus File Manager and access those files you granted access to.
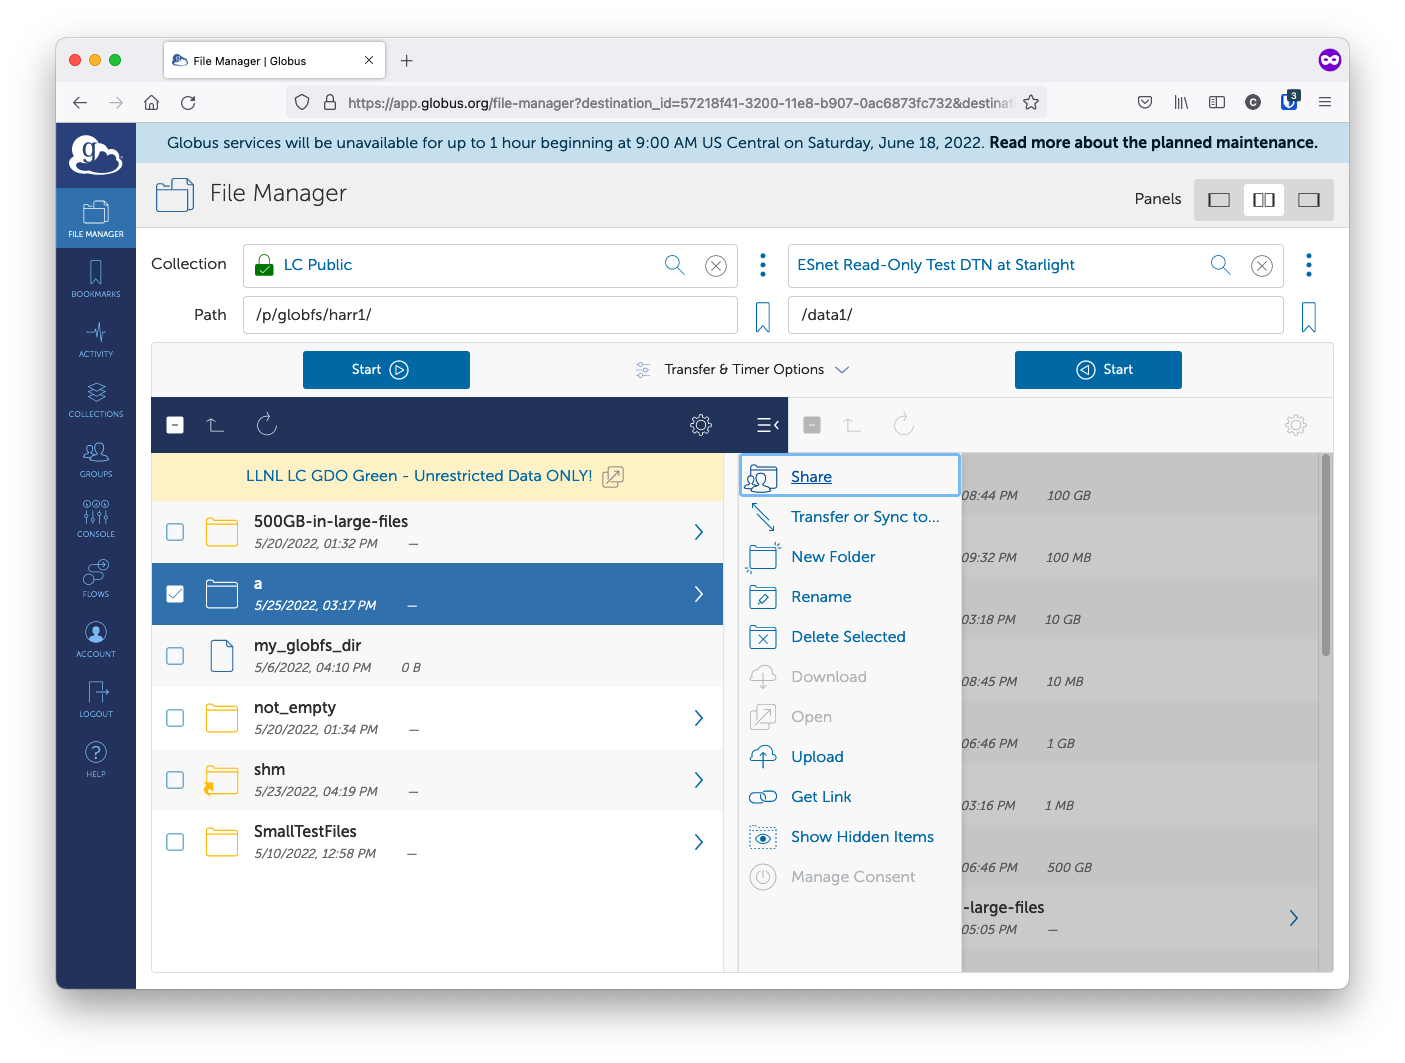
To share files, first select the files you wish to share in the File Manager, then click on the "Share" icon on the right panel.
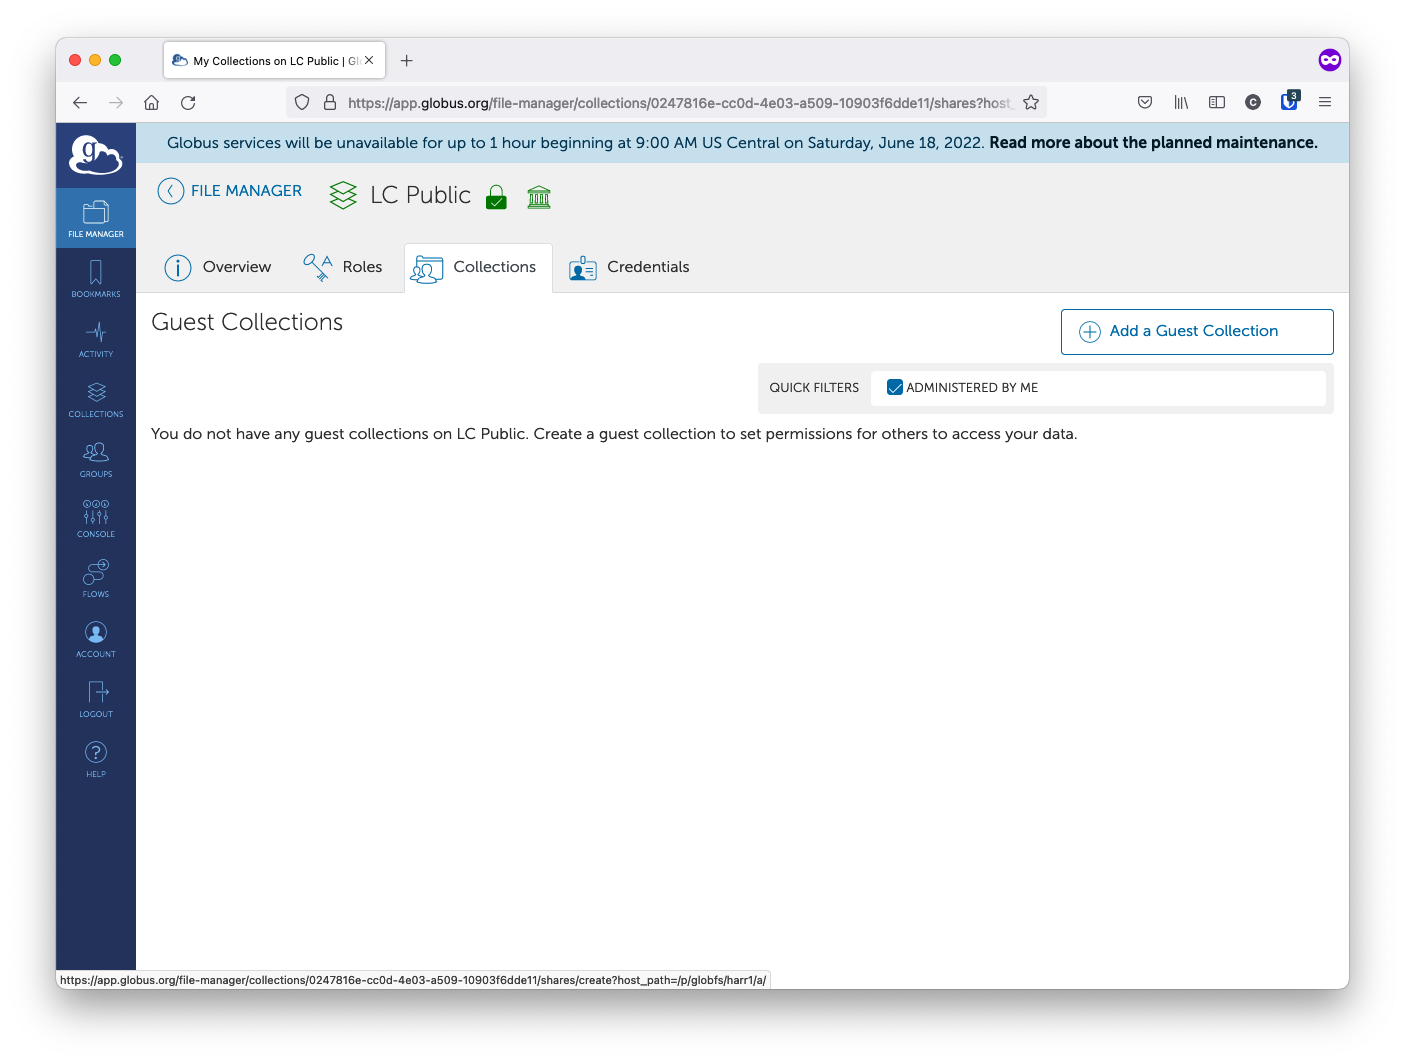
In the next screen fill out the relevant fields and click "Create Collection":

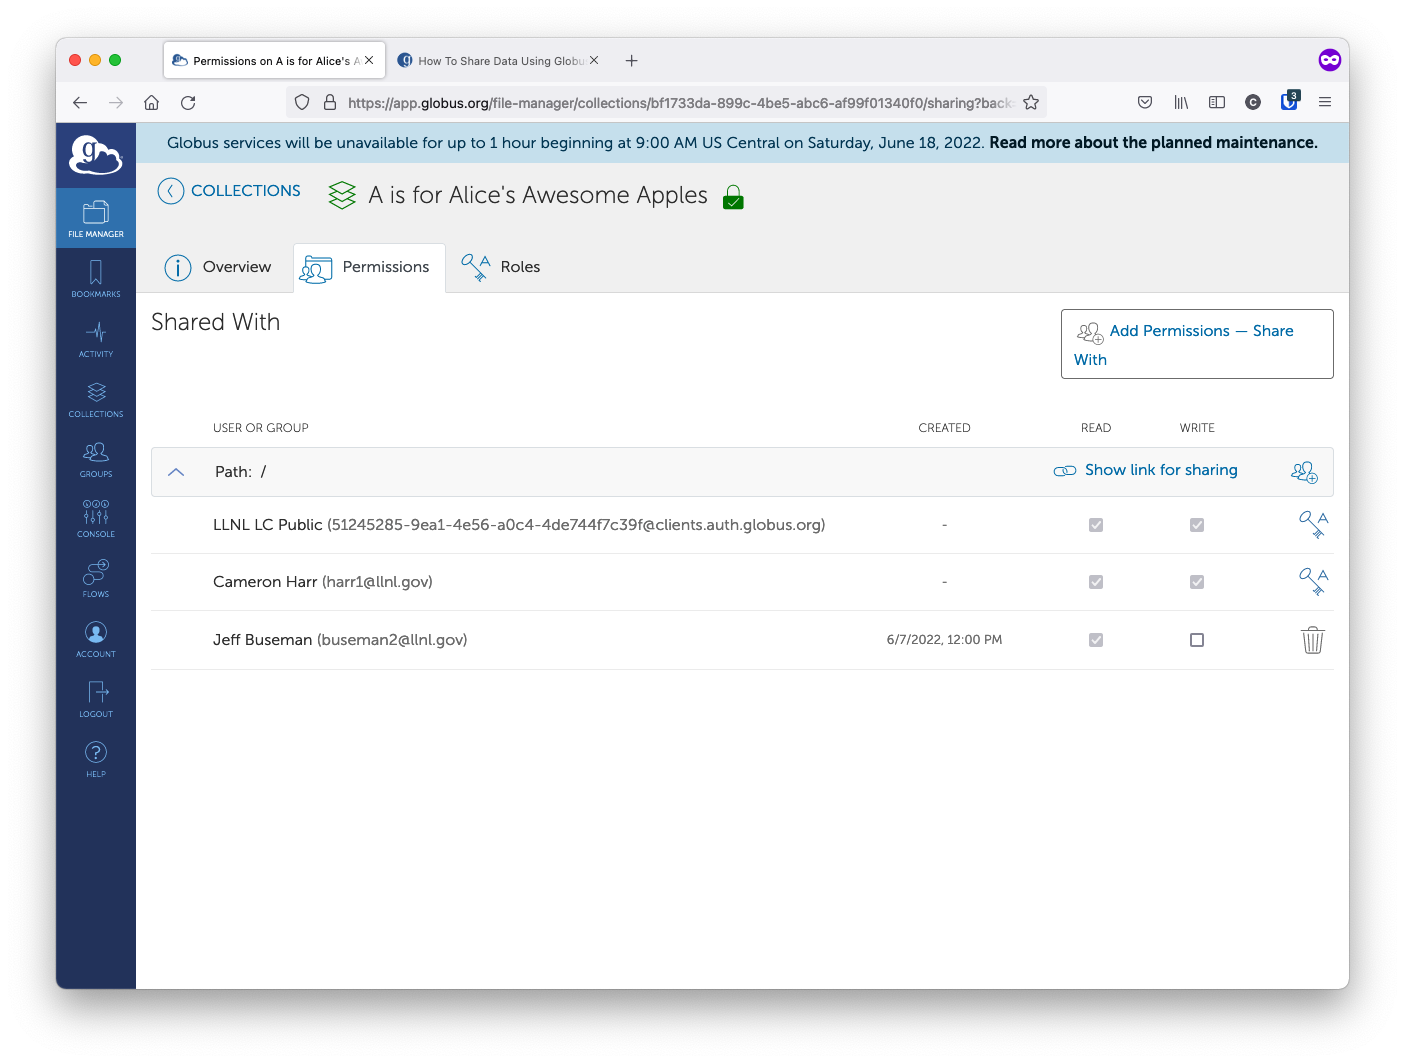
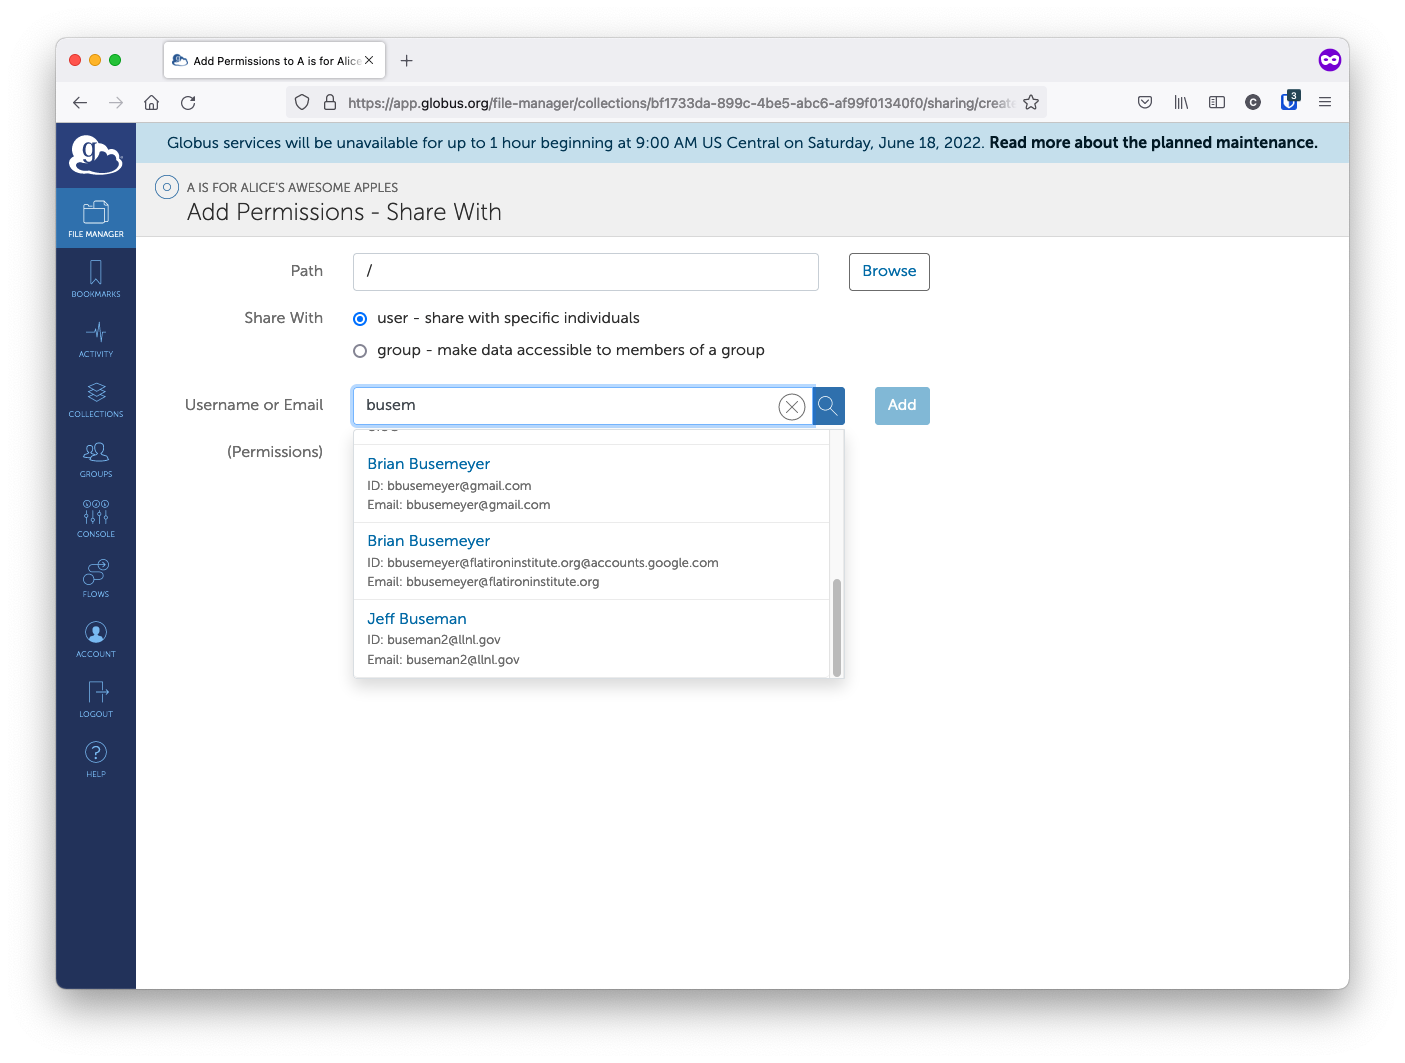
You then can click on the "Add Permissions - Share With" link on the right-hand side and in the succeeding screen, select the Globus user(s) you wish to share the dataset with. As you type a name, the Globus Web App should auto-match valid users. By default you are granting read-only permissions, but if they have LC accounts, you can also allow them to write to your collection. Users without LC accounts will not be able to write to the collection regardless of whether you grant them write permissions.

After adding the user(s), you can then verify in the Collection summary that the user has access. You may also share a link to your collection to users that have already been granted access to it.